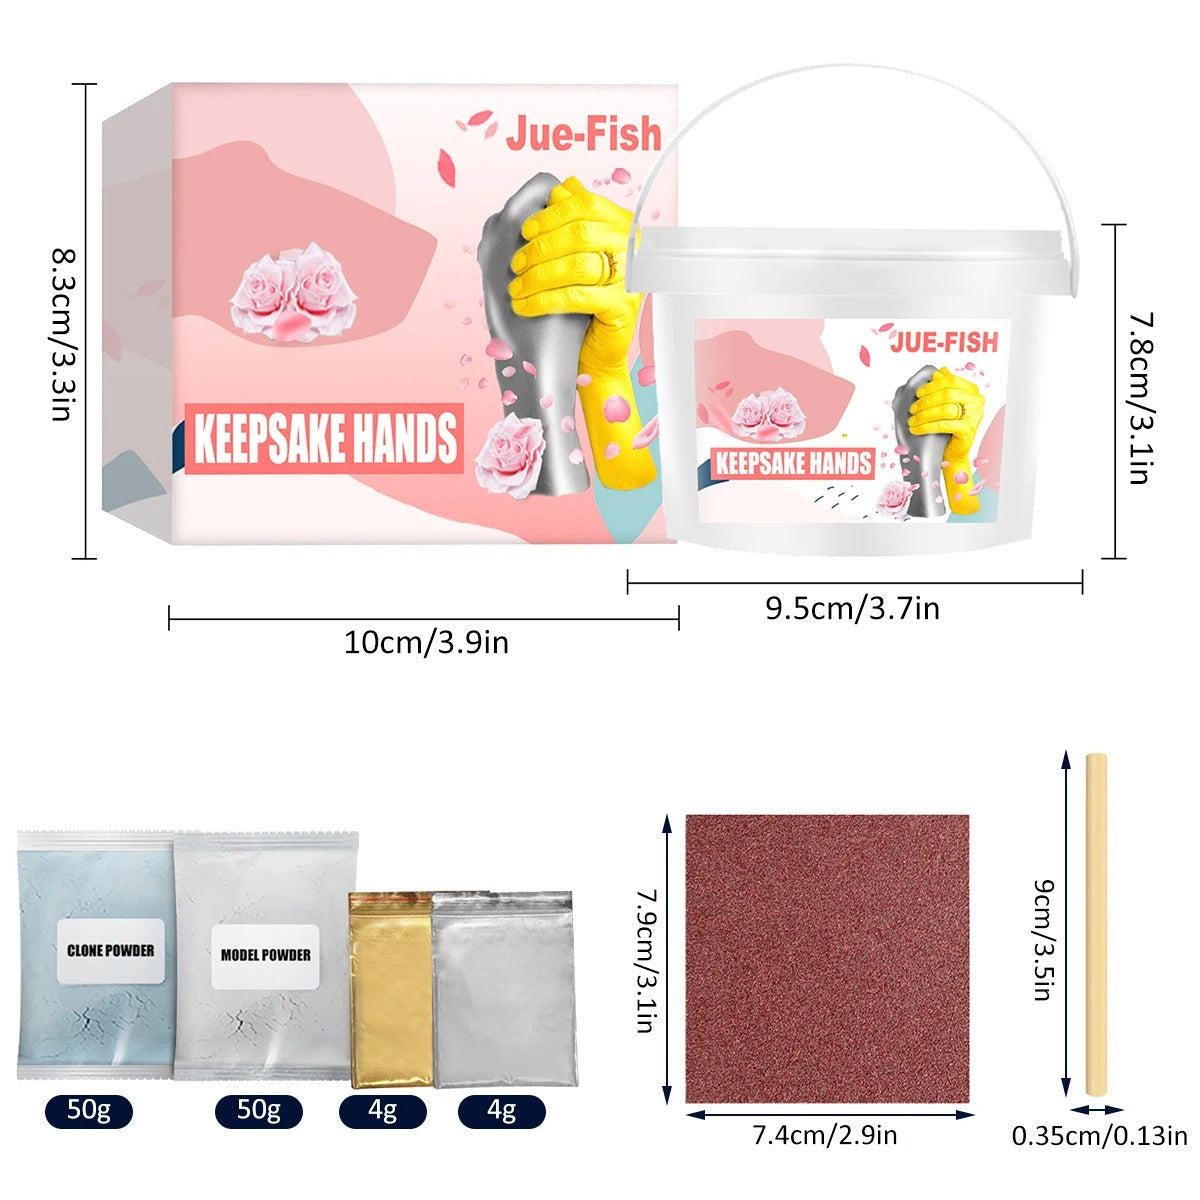
One hand: Clone powder 60g + water 160ml | Model powder 80g + water 50ml
One foot: Clone powder 80g + water 200ml | Model powder 100g + water 70ml
3-12 months:
One hand: Clone powder 100g + water 250ml | Model powder 150g + water 100ml
One foot: Clone powder 150g + water 400ml | Model powder 200g + water 130ml
2-4 years old:
One hand: Clone powder 150g + water 400ml | Model powder 200g + water 130ml
One foot: Clone powder 200g + water 500ml | Model powder 250g + water 160ml
5-12 years old:
One hand: Clone powder 200g + water 500ml | Model powder 250g + water 160ml
One foot: Clone powder 250g + water 600ml | Model powder 300g + water 200ml
Adult one hand:
Clone powder 300g + water 1100ml | Model powder 600g + water 500ml
Adult hands:
Clone powder 500g + water 1600ml | Model powder 1200g + water 800ml
Note: Choose a container that fits your hand or foot with some space around it without touching the sides. Use water at 10-20°C for the clone powder. Higher temperatures will accelerate solidification. The model powder can be mixed with room temperature tap water.
Instructions:
Prepare Molding Mixture: Mix the molding powder with 3 to 3.2 times the amount of water (300-320 ml). Stir quickly until the mixture is smooth. The mixture will turn a purple/pink color. Do not add too much water.
Submerge Hand or Foot: After 1 minute, place the baby's hand or foot into the mixture, ensuring complete submersion without breaking the surface or touching the container edges.
Hold Still: Keep the hand or foot as still as possible while the mixture sets.
Set the Mold: Hold for an additional 240 seconds to ensure the mold is fully set. Carefully remove the hand or foot from the mold.
Release Air: Slightly wiggle the hand or foot to allow air to enter the mold opening for an easy release.
Prepare Plaster Mixture: Mix 50g of plaster powder with 80-90 ml of water. Stir quickly until smooth. Avoid adding too much water for a stronger casting.
Pour Plaster: Slowly pour the plaster mixture into the mold. Jiggle the mold gently to fill all areas and avoid air bubbles.
Set the Plaster: Let the plaster set for 1 hour. Gently remove the mold from the casting using a knife or your hands, being careful not to break the casting.
Clean and Dry: Wash off any surface powder with water and let the casting air dry for 24 hours.
Paint (Optional): After 24 hours, paint the casting in any color you like.
Important: Do not add too much water to the powder mixture, as this will prevent the casting from setting properly